Nesting instinct
Jim Connelly creates a nest full of painterly projects for a happy baby's room.
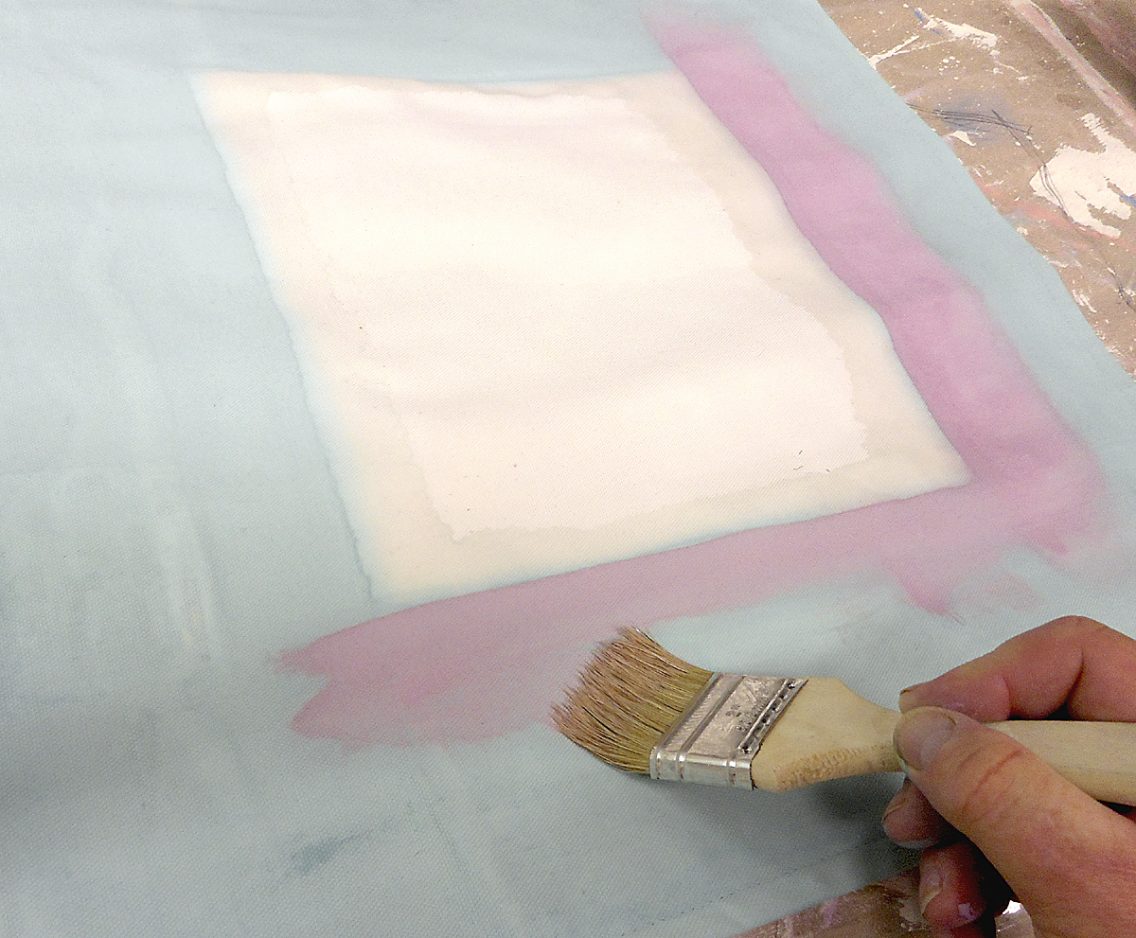
Overlap part of the turquoise border with pink, blending it softly.
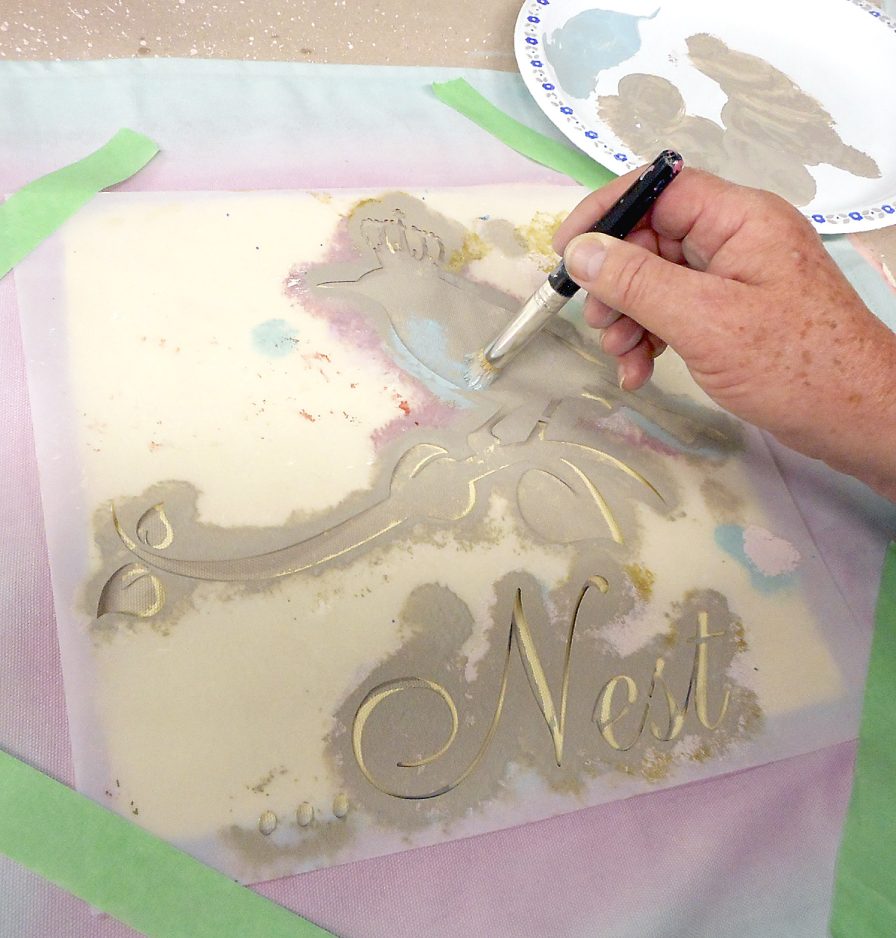
Stencil pink and turquoise to define the wing, breast and tail.
One of the most joyful decorating experiences has got to be preparing a nursery. All the dreams and good wishes for our children start here. This room represents a starting point and a safe haven where bunny rabbits can talk, bees whisper secrets, wild animals are our best friends and birds teach us how to fly.
We spend many hours in the nursery, day and night, feeding, changing, reading and singing to our babies, so this room is a haven for moms and dads too. You have a happy range of colors and themes to choose from, and my advice is to go with what your inner child loves.
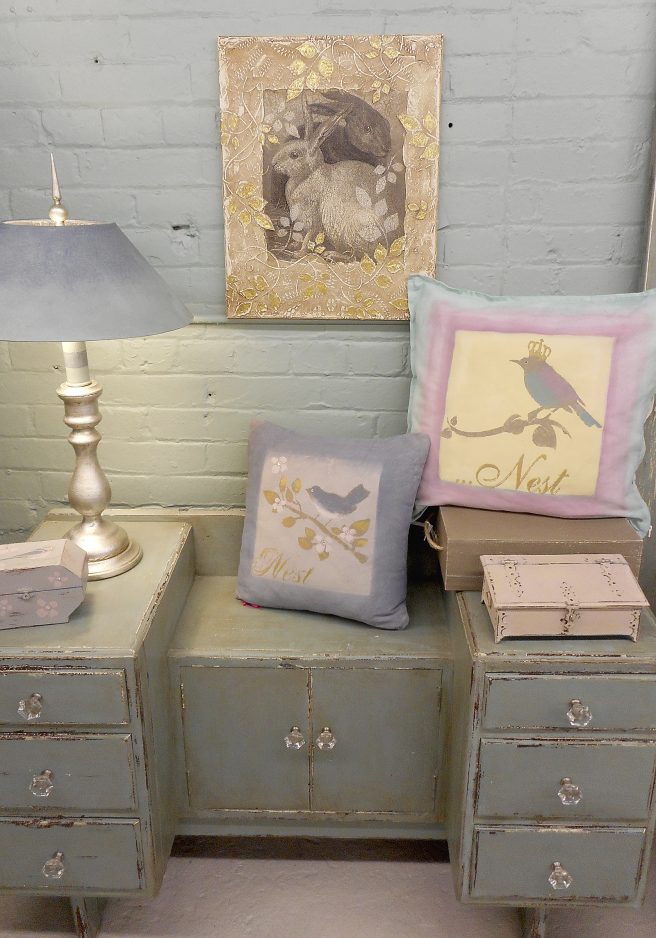
I visited my good friend, TV buddy, decorative artist and teacher Jimmy Connelly at his Toronto studio (www.jimconnellystudios.com) and was inspired by a series of pillows and accessories he had created around the theme of nesting. What a perfect image for a nursery! We got busy with the paints and thought about painting on fabric and all the ways you could use stencils, and here are the results. The fabric painted nest pillows are an easy project that can be replicated on curtain panels, bedding or a fabric picture. Here’s how we did it.
The cover for the large cushion is cotton, readymade, 20 inches by 20 inches. It’s important to use cotton so that the paint will be absorbed. You can use any water-based paint. We used Chalk Paint decorative paint by Annie Sloan; two paint brushes, a 2-inch bristle brush for the border and a stencil brush; and a bird stencil, this one is called Kingfisher and is wearing a crown.
Cut a piece of cardboard to size, and slip it into the cushion cover so that the paint won’t bleed through to the back panel. For the borders, thin the paint down with water, and apply a 4-inch turquoise border with the 2-inch paintbrush. Follow with thinned-down pink paint, overlapping the turquoise border by 2 inches. Paint the center with thinned-down cream paint. The cover is going to be wet, but that’s OK. Continue with the stenciling. Use tape to hold down the stencil. Using a stencil brush, stencil stone gray over the entire pattern, bird, branch and letters. Now stencil turquoise over the bird’s breast and tail, pink for the wing and gold for the crown.
Make the bird’s eye by dipping the end of a thin brush in black paint and dabbing in place. To make a drop shadow on the letters, remove the tape and move the stencil up and over to the right about 1/4 inch. Fill in the letters with gold. The letters will now look gold with a gray shadow.
Once you have started painting, it’s hard to stop. A lampshade is easy to decorate with graduated color, creating an ombre effect that imitates the look of a night sky. As you move from top to bottom, thin down the paint to make it a lighter version of the same color.
Stencil patterns can be reproduced on virtually any surface. Repeat part of the stencil, add to your stencil picture with a second stencil of trailing ivy, stencil other words or phrases to make each item your own.
Please email your questions to house2home@debbietravis.com.